Every single person eats with their eyes. As good as that casserole or sandwich may be, if it doesn't look appealing no one's going to want to try a bite. That's where food photography comes into play. Used as a means to tell a story about a specific recipe or even as a moment in time captured, the art of food photography is becoming mainstream with the help of food blogs and social media like Instagram feeds and Facebook.
Today, cameras and smart phones are making it easier than ever to produce tantalizing photos to share with family and friends. Some phones like the IPhone X have automatic depth features which make your food stand out from the background behind it. This is the same concept behind a DSLR camera, which you can change the depth of field using the aperture setting. But we'll cover more on this later.
How To Take Killer Food Photos
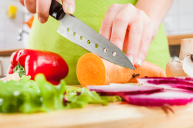
1. Choose your subject.
To begin, let's first talk about the food itself. Not every single plate of food can be photographed the same way thus each food requires a bit of thinking to get the perfect shot. Colorful foods like salads and fruit tend to be easier to shoot due to their attraction to the eye. Desserts also seem to be more pleasing than some savory plates due to their nature of being sweet.
Lesson 1: Line up 5 different foods on a counter or table. Which do you feel is the most visually attractive? Do you notice different shapes in the foods?
Pick the food that you find most visually attractive and hold on to it. We will be photographing it soon.
2. Set the scene.
So now that you've got your food it's time to set up the scene. You want the background of your photo to be pretty minimal so the eye can focus on the food itself. I recommend shooting on a table against a light colored wall to fully enhance your photo. If you have any napkins or even a fork it will add to the scene and add a bit more of a story. Food styling is key to creating a high quality Instagram food photo.
Lesson 2: Prepare a scene with your plate of food. This scene can include cutlery, glasses, napkins and other items you would find on a table.
3. Prepare the lighting.
While finding a place to shoot I highly recommend setting up the shot next to a natural light source like a window or a patio like I used above. Natural light is a food photographer's best friend and it's the best lighting to make your food pop.
If natural light is not available try to use a light source that is close to natural as possible. Normal home lights tend to be yellow making your photos look unappetizing so look for a less intense light source. While you can fix this a bit in post-production by adjusting the white balance the photos won't look nearly as crisp.
Lesson 3: Set up your scene next to a window. Does the light look too bright? Use a white tablecloth to diffuse some of the light.
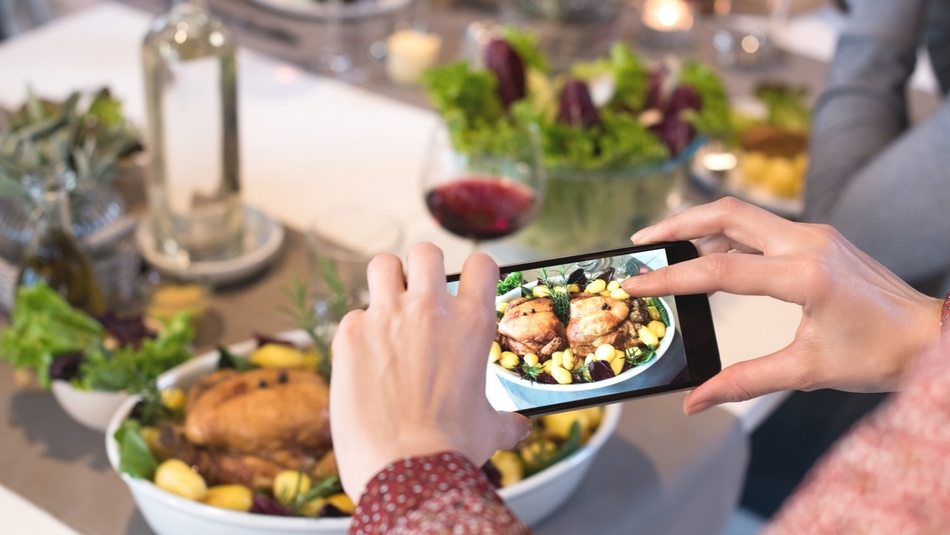
4. Grab your camera.
Now that you have your plate of food and your lighting set up it's time to grab your camera. The great thing with smartphones nowadays is that most of their cameras take beautiful pictures. There's no need to invest in a fancy camera when you are just starting out; a phone will do just fine.
When I shoot with my phone I like to hold the focus on one spot in the photo specifically. With IPhones you can achieve this by holding your finger on the screen to lock the focus.
Some phones also have depth features, making the subject in focus stand out while the background is blurred. This is also a great feature to use with food photos. As you can see in the photography above the fried donut is in focus while the background is fuzzy, making your eye focus on the food.
Lesson 4: Grab your camera (or phone) and play around with the features in the camera. What did you learn that you didn't know before?
5. It's all about the angle.
It's finally time to shoot! There's only three basic angles you need to create the perfect shot: straight above, 45-degrees and 90-degrees. Let's go into each angle individually.
One of the most aesthetically pleasing shots for food is from straight above. This angle lets you get an entire look of the plate and puts the food in a dimension plane. These types of shots are perfect for plates filled with a variety of different foods, the top of a cake or something relatively flat like a pizza.
The 45-degree angle is one of the most popular angles in food photography since it mimics the way a person sees a plate of food. This angle is great to show the height in the food as well as small details. You can shoot any kind of food with this angle.
Finally, the 90-degree angle is best used for items that are tall or that look best when viewed vertically. For instance, a 10-layer cake is best shot from this angle to show all of the layers. Drinks in clear glasses are also best shot from this angle.
Lesson 5: Photograph the same plate of food with the three angles mentioned above. Which one fits the best? Which one is the worst angle for your food?
6. Tell a story.
The angle is figured out and it's almost time to finally press down the shutter button. What more is there to do?
Tell the story. That is, food isn't always perfect. Those small pieces of crumbs or imperfections make the image interesting. A hand grabbing a cookie from a plate or an ice cream cone dripping adds another element to the photo. Get the plate messy and take a few shots.
Lesson 6: Take pictures while eating your food. Which photos do you prefer?
7. Edit it down.
You've finally taken a bunch of shots but we aren't finished yet. Pick out your best picture. Does it tell a story? Does it make you want to bite into the page? If the answer is yes, it's time to make a few final touches to the image with editing software.
Most phones have simple editing abilities right in the photo application that can adjust numerous things from exposure to color. Take a few minutes to play around with an edit you like.
Once you are finished with your photo it's time to share it!
Lesson 7: Share your photo on Instagram with the hashtag #wideopeneats to be featured on our Instagram page. We'd love to see the beautiful food photos you have taken.