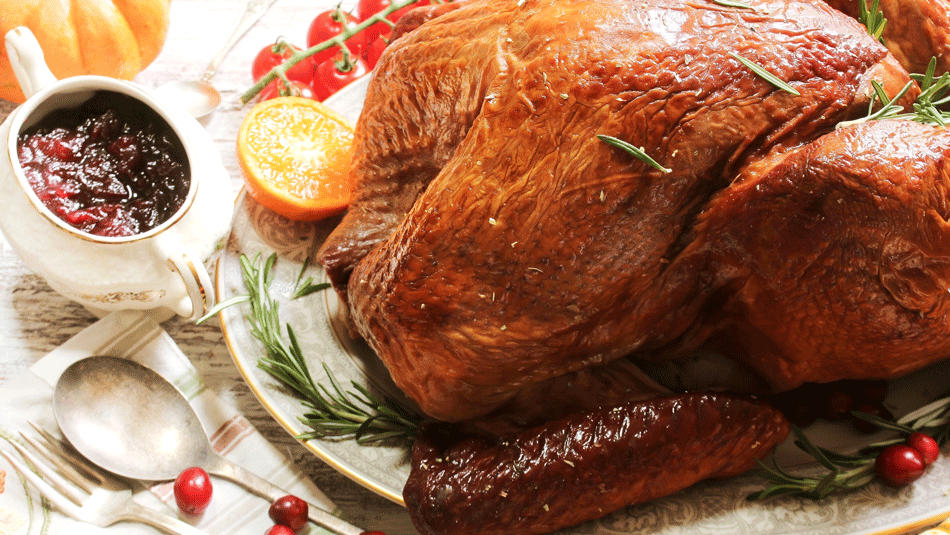
We're in the final countdown: Thanksgiving is a few short days away. Your turkey is thawed (or if it isn't, definitely hop over to our how to thaw a frozen turkey guide). Your guests are invited, the house is cleaned, and your finest serving platters (that you only pull out once a year) are ready to go. It's time to host Thanksgiving dinner and cook that turkey. But maybe you're starting to feel nervous. Do you know how to cook a turkey? What if you haven't prepared it properly?
All of these feelings are completely natural - you're about to serve a very large roasted turkey to a crowd! There's no need to worry, though, because you have us to walk you through the process step-by-step. Cooking turkey doesn't have to be stressful. Trust us, this is going to be the best Thanksgiving turkey yet!
1. Thaw that turkey.
Unless you bought a fresh turkey, you'll need to thaw it before you can get started. If you're not sure how long it will take, check in on our guide, when should you thaw turkey for Thanksgiving.
It will walk you through the step-by-step instructions of thawing turkey in the refrigerator, using cold water, or even in the microwave (although, really we don't recommend that last method unless absolutely necessary).
2. Start with the brine.
If you want a tender, moist turkey with super juicy meat, then brining is the way to go. At its most basic, brine is a solution of salt and water (and sometimes sugar). The proteins inside the turkey are denatured as it sits in the brine, dissolving some of the fibers and rendering them unable to contract while cooking. In the end, the bring improves the turkey's ability to retain moisture as it cooks.
You have two options when it comes to brine. The traditional brine is a wet brine that uses water. It will plump the turkey's meat up with water, which is great for retaining moisture but it does water down the natural turkey flavor. Personally, I prefer a dry brine because it enhances the turkey's flavor without adding excess moisture.
Either way, brining is a good thing, so choose the one you feel more comfortable with. Do note that kosher, self-basting, or enhanced turkeys are already treated with salt, so you don't need to brine these types of turkeys.
The Basic Wet Brine
Find a container that is large enough to hold your turkey. I've used plastic trash bags before, and it looks weird but it does work in a pinch. In a large bowl, prepare a brine of 6 percent salt by weight. For most turkeys, that's dissolving 2 1/2 cups kosher salt into 2 gallons water. If your turkey is very large (we're talking an 18+ pound turkey) you should use 3 3/4 cup salt into 3 gallons water. Submerge the turkey into the salted water and allow it to sit for 12 to 18 hours.
Once brined, all you need to do is pat the turkey dry with paper towels (no need to rinse). Make sure to get inside of the body cavity as well.
The Basic Dry Brine
In a small bowl, combine 6 tablespoons kosher salt with 2 tablespoons baking soda. Pat the turkey dry using paper towels and set it on a rack set in a rimmed baking sheet. Sprinkle the salt mixture onto the turkey's skin, lightly rubbing it in until the turkey is completely encrusted. Depending on the size of your bird, you may not need all of the salt mixture. Allow the turkey to dry brine for 12 to 24 hours.
You will not need to rinse the brine or pat the turkey with paper towels - it is ready to roast on your roasting rack.
What about aromatics?
Some brine recipes call for heating the brine with any number of aromatic ingredients, including herbs, black pepper, carrots, onions, or spices. This isn't really necessary. These flavors make the brine smell good, but they won't penetrate the meat in the same way that salt can. It's better to use these ingredients in the spice rub or compound butter later.
3. Remove the turkey from the refrigerator.
Removing the chill from the turkey is a seriously important step. You know how you let steaks come to room temperature before cooking them? This helps the steak cook evenly from outside to inside, ensuring the perfect medium rare (if that's what you're going for). The same principle goes for turkey.
You want to remove the chill from the turkey so it cooks as evenly as possible. Even pulling it out during the time that it takes to preheat the oven will help, but preferably you want to let it rest at room temperature for at least 30 minutes.
Take the turkey out of the fridge and let stand in a large roasting pan. If you're cooking it over aromatic ingredients to catch the drippings (like onions, carrots, celery, or fennel), you can place those in the bottom of the roasting pan now.
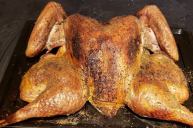
4. Truss the bird.

Unless you spatchcocked the bird, you should truss your turkey. (Wondering why you should spatchcock your turkey? How about shorter roasting time and crispy skin!?). This is one of those things that seems totally overwhelming until you do it for the first time. After that, you'll wonder what you were afraid of!
Trussing will not only make your turkey look beautiful out at the table, but it will help the bird cook more evenly, too. The dark meat (the drumsticks and the thighs) cook more slowly than the white meat (the breasts). Even if you cover the turkey breast meat halfway with aluminum foil, there is a chance it will dry out before the legs and thighs cook. Trussing keeps those legs and thighs tucked into the sides of the breasts, forcing the turkey to become a uniform shape and cook at a more even rate.
Start by positioning the turkey so the drumsticks are facing toward you with the turkey breast-side up. Wrap the cooking twine around the turkey's neck bone, in between the two breasts. Tuck the wings under the bird and wrap the twine around the outsides of the wings, pulling the twine underneath the breastplate towards you.
Tie a knot to secure everything so far then, all you have to do is cross the legs and tie them together into a knot. That's it! Easy peasy.
5. Don't forget to probe your turkey.

The best way to ensure your turkey will cook to a perfect internal temperature of 165 degrees F is to probe it with an instant-read meat thermometer. It is important that the dark meat reaches this temperature, as well as any stuffing if you are cooking a stuffed turkey.
Place the thermometer into the thickest part of the thigh meat, being careful not to hit an air pocket or touch the bone.
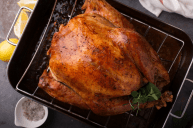
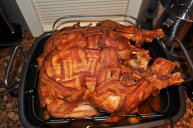
6. Roast away!
Check out our ultimate guide to roasting a turkey in the oven for specific details, but long story short: preheat the oven to 450 degrees F to get some crisp on the skin. Once you place the turkey in the oven, immediately reduce the heat to 350 degrees F. In general, your cooking time is 13 minutes for each pound of turkey (this is for an unstuffed turkey, one that has stuffing will take a little bit longer).
And if you spatchcocked the turkey, the roasting rules are different, so take a look at our post for how to spatchcock a turkey. While the turkey cooks, you can get started on your side dishes, or if you cooked them ahead of time, you can chill out and watch some football!
7. Letting it rest is the most important step.
Letting the turkey rest is one of the most important steps. If you carve it too early, all of those delicious juices you worked so hard to create will just spill out onto the cutting board. It's hard to stand back and let it stand for at least 15 minutes (but preferably 45 minutes), but trust us - this will make the best Thanksgiving oven-roasted turkey.
While the turkey is resting, you can make your favorite Thanksgiving recipes. This gives you time to put the finishing touches on that turkey gravy and reheat all your Thanksgiving side dishes. If you need to revive your mashed potatoes, try adding a little melted butter.
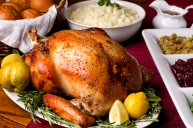
So that's it, the perfect Thanksgiving turkey hit the table and everyone is happy. Let us know how your meal turned out - we can't wait to hear all about it!